Painting On Glass
Glass painting can be done by anyone its one of the simplest painting method. No great painting or drawing skills required, a little practice and patience is all you need. But you should be cautious while working in glass you have to handle it very carefully and framing charges for glass is also pretty costly so for the beginning stage while you want to practice and in Glass painting there is an easy way without using actual GLASS ! 
ohp sheet
For hassle free learning OHP sheet is best. It works perfect for beginners to practice Glass painting on it. So let me teach you how to make a simple and beautiful Glass painting using an OHP sheet and few Glass painting supplies. You can even frame it with a cardboard and few tapes. Shall we move on to the tutorial ? 🙂
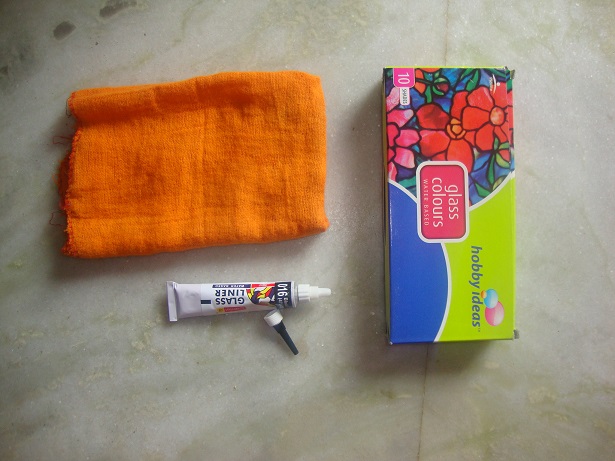
Supplies you will need to make glass painting on ohp sheet :
- OHP Sheet
- A design to be copied
- Glass paint (Water based)
- Glass Out-liner.
- Cardboard for framing
- Silver Foil
- A soft cloth to wipe excess paint or any mistakes
My Method : (ohp sheet painting)
- Take a clean OHP sheet of any size. A standard A4 size will be available in all stationery stores. If you are confident you can straight away do in glass itself.
- Choose a design You can either get a glass painting design book or download designs from internet.You will get loads of designs in the internet.
- I chose a dancing girl’s picture with Diya in hand
- Re size your design as per your need ( according to the size of your OHP sheet ). Mine is A4 size
- Clean the surface of the OHP sheet with a soft cloth before starting to paint.
- Take a Flat writing board stick your design on it with tape.

- Place the OHP sheet on top of the design now secure both in place with painters tape or any tape.
- Make sure this arrangement doesn’t move or shake until you finish your painting.
- Now trace the outlines of the design on the OHP using glass outliner. Slowly squeeze from the top of the Liner tube
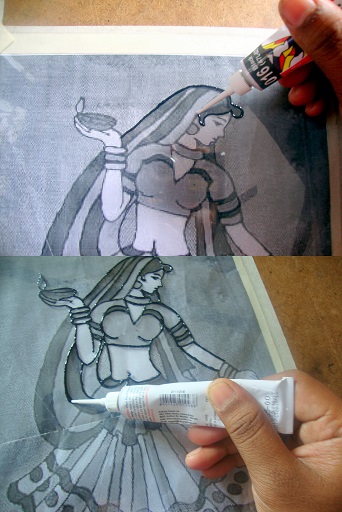
- Start from the top and proceed to the bottom of the design so that you won’t smudge the lines.Try to make continuous lines.
- Don’t squeeze too much you will get thicker lines it won’t be good. But don’t put very thin lines also. It has to be sufficiently thick to hold the Glass paint from flowing outside the lines
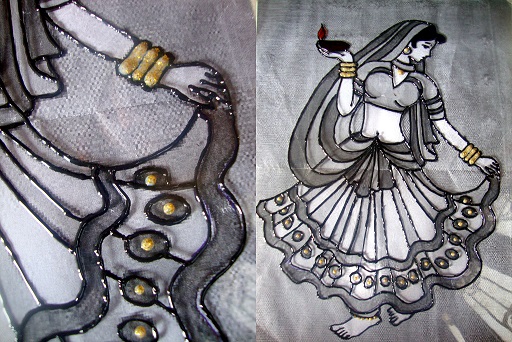
- I used 3D Fabric liners in Golden colour for the ornaments and for glittery work in the girl’s dress. This adds little charm to the painting

- Once you complete outlining the design. Allow it to dry for 10 to 15 mins.
- In case you made any mistakes in the outline don’y worry You can peel it of once it is dry. Don’t wipe while wet.
- After the outline is dry you can start filling colours inside the design.
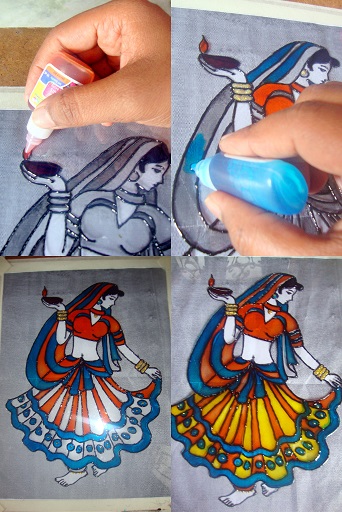
- Choosing the colours is the difficult part for me. I am not good at it usually my Buddy helps me with it.
- While pouring the colours avoid air bubbles. If suppose you got bubbles break them with a needle or use ear buds to break them.
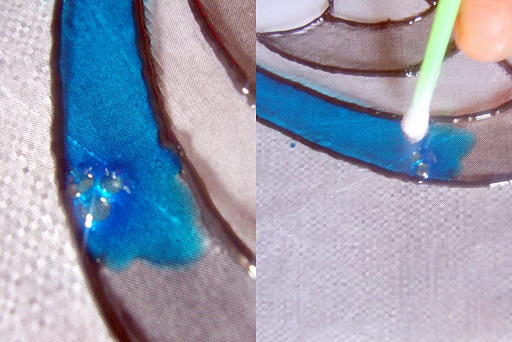
- It the lines are thin the adjacent colours may mix up. If you want to avoid it don’t fill adjacent parts at the same time. Let them dry and fill alternatively.
- For the skin colour of the girl I didn’t have exact glass painting colours so I used acrylic paint for that .
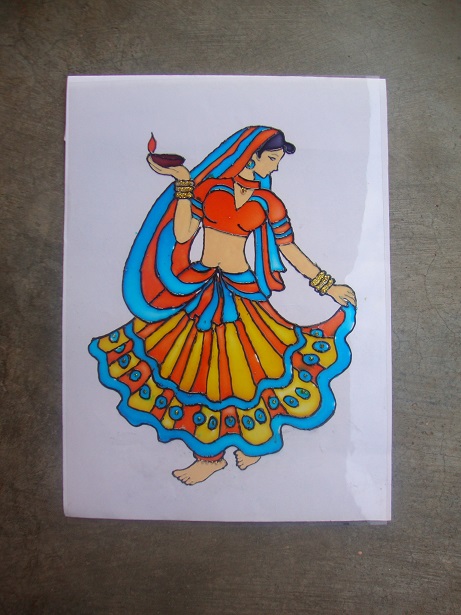
- Once the design is completed allow it to dry for 30 to 40 mins.
- Now remove the OHP sheet carefully from the board.
- Reverse it and Frame it using a thick cardboard and Tape. I used Plain Black colour tape.
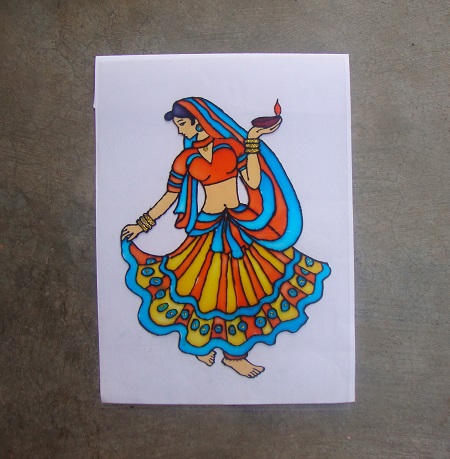
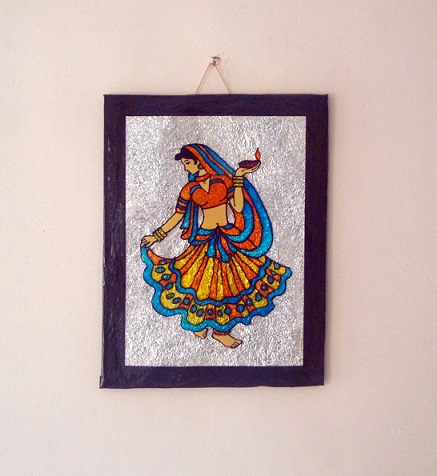
- You can place crushed silver foil (optional) behind the painting as background while framing it.

- Thats it Gorgeous glass painting ready ! 🙂 Sounds easy right 🙂 You must make one definitely. Try it out and let me know how it turned out. Same way You can even make Greeting cards with OHP sheets and glass painting you have to just stick the OHP painting on card stock beautiful Greeting cards will be ready in minutes. More creative uses can be made with this glass paint.
Happy Crafting 🙂
